How to Use ESA Embroidery Glyphs
When we mention ESA Glyphs, think of ancient Egyptian “hieroglyphics,” something that is a shape or symbol. Our ESA Glyph packs load directly into your Wilcom E series or Hatch embroidery software like an ESA font does. The only difference is when you use them, a shape or symbol appears instead of a letter. ESA Glyphs allow you to easily create shapes & objects for your embroidery projects with the click of a button. View the instructions below on how to use them:
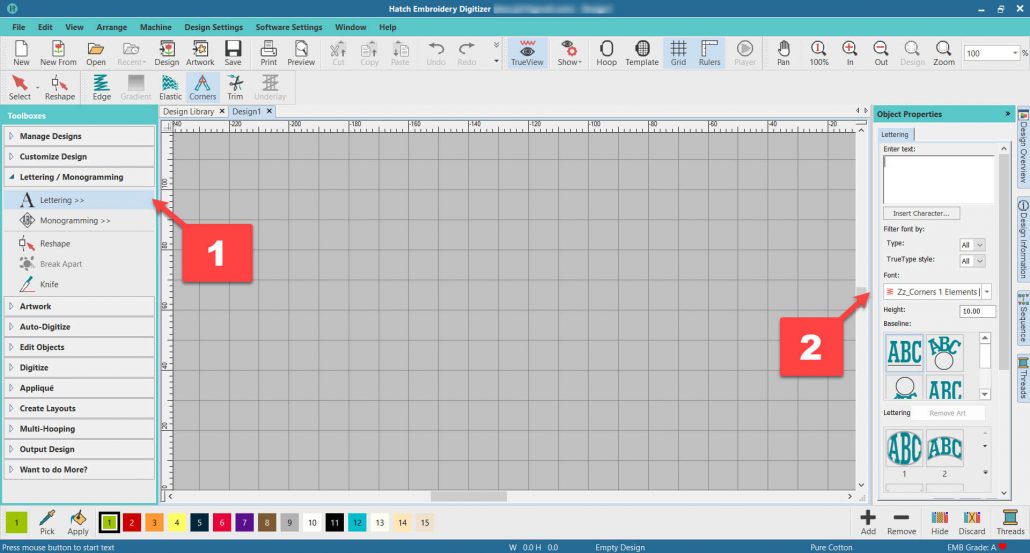
Step 1: Select the “Lettering” tool under the “Lettering / Monogramming” drop-down menu. From here, select your ESA Glyph font in the drop-down bar.
Step 2: Select your ESA Glyph. All of our Glyphs begin with the letters Zz_ so that they appear at the bottom of your ESA font list.

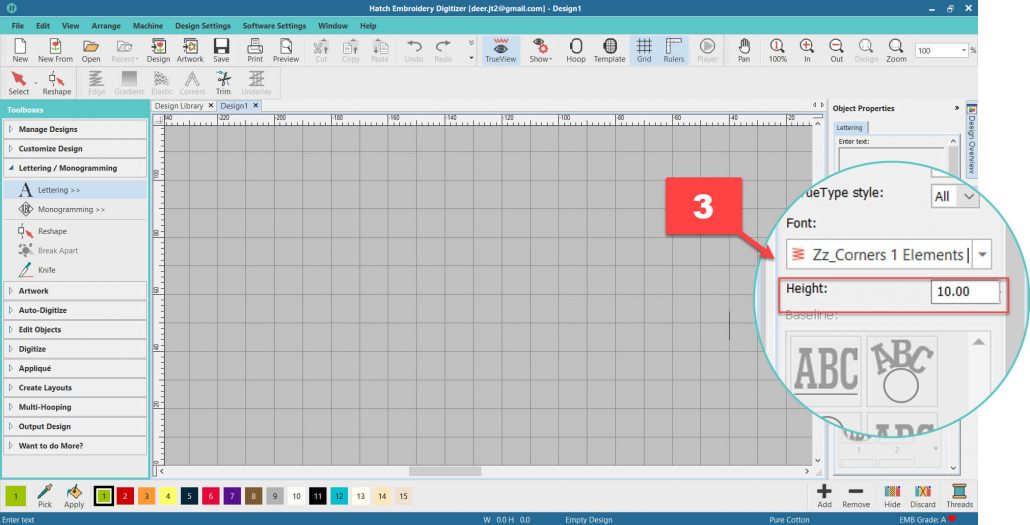
Step 3 (Important): Before generating the ESA Glyph, you MUST change the default height from 10mm to 100mm or ELSE HATCH WILL CRASH.

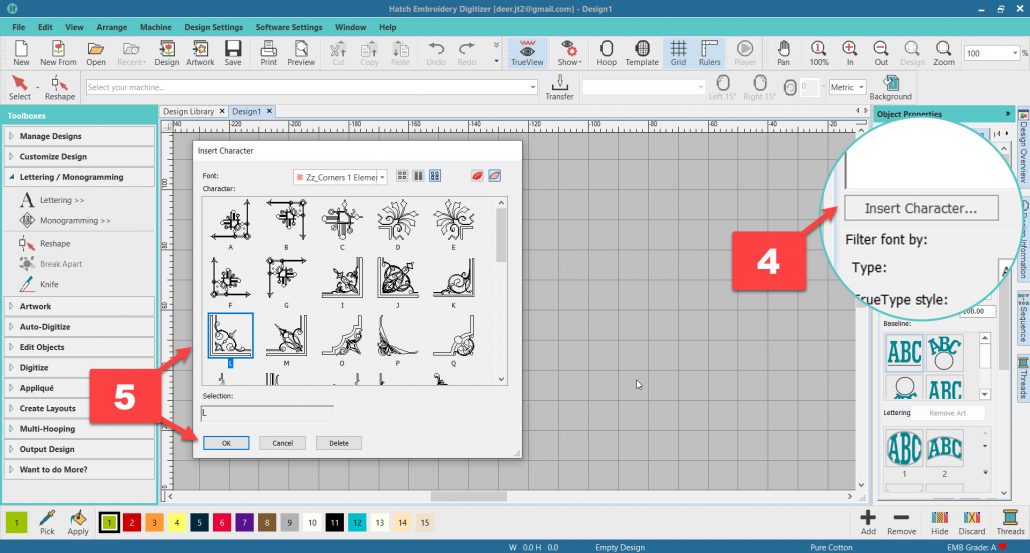
Step 4: Click on the “Insert Character” button. A new window will appear inside of Hatch, displaying the ESA Glyphs within this pack.
Step 5: Click on the ESA Glyph you’d like to use and then click “OK”. Congratulations, you’re ESA Glyph will now appear on screen!

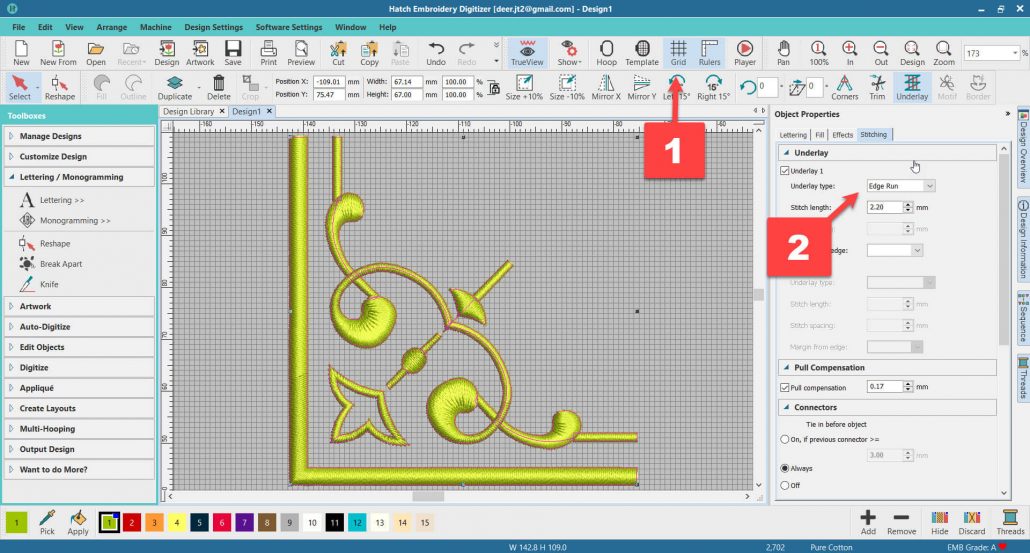
ESA Glyph Tip 1: Set your “Grid” tool to 1mm squares so you can see if any of the details are too small.
ESA Glyph Tip 2: Set “Underlay Type” to best suit the size of your Glyph.

ESA Glyphs are installed the same way that ESA fonts are. Click here to learn how to install them into your software now.
Want to use ESA Glyphs? Click here to browse our ESA Glyph categories now.
